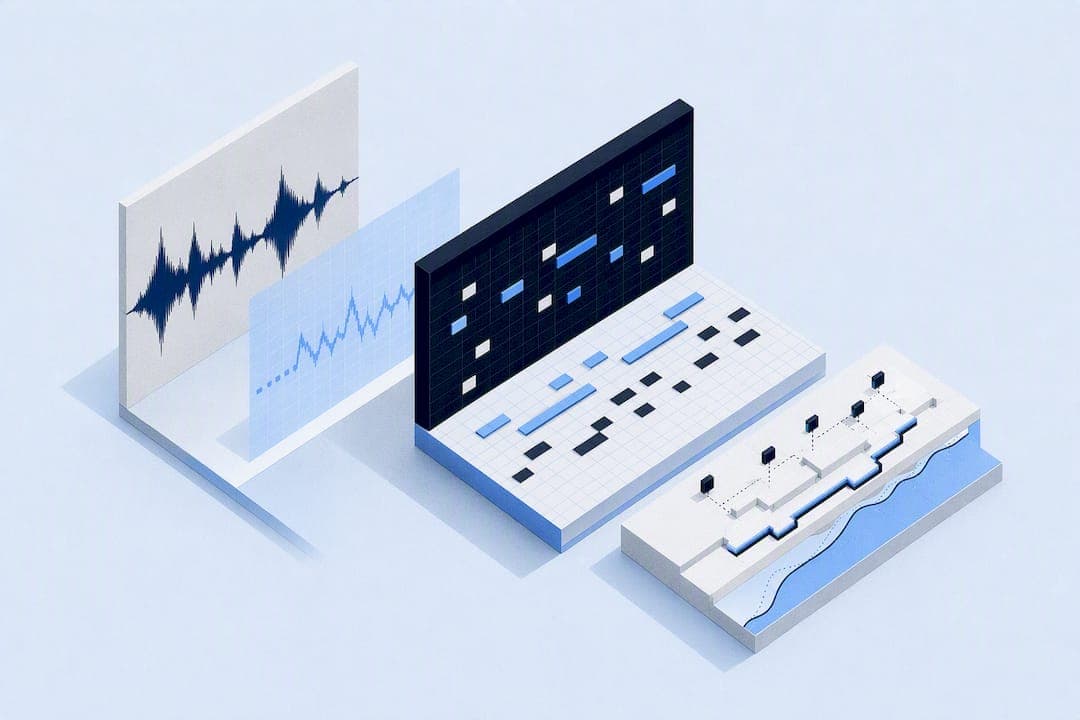
Yes. Solo piano audio can be converted into editable MIDI, but expect a draft, not a finished score. The transcription will catch most notes and timing, but you'll still need to clean up sustain pedal data and velocity nuance by hand. That draft is enough to edit in a DAW, arrange for another instrument, or study a performance note by note, which is exactly why so many musicians reach for audio to midi piano tools before touching a notation program.
TL;DR:
- Transcribing piano audio into MIDI works best with clean, dry signals from digital pianos or close-miked acoustic sources, with heavy reverb and pedal use reducing accuracy.
- Using high-bitrate WAV or FLAC files improves transcription precision, while low-quality MP3s from streaming audio often lack necessary detail, making manual cleanup unavoidable.
- Manual correction of MIDI involves fixing octave errors, timing drift, removing duplicated notes, and adding sustain pedal data, with listening tests essential for quality assurance.
- Piano-trained models like PianoViz outperform generalist converters on dense chords and sustain-heavy recordings, especially when using local or open-source tools for privacy or customization needs.
- Raw MIDI should be carefully humanized and dynamics rebuilt to produce a natural performance sound, and imported MIDI works across Ableton, Logic, and FL Studio with similar straightforward steps.
Table of Contents
- How to Turn Piano Audio Into MIDI
- What Actually Determines Transcription Accuracy
- Cleaning Up MIDI Once It's in Your DAW
- What to Look for in a Piano-to-MIDI Tool
- Getting Your MIDI Into Ableton, Logic, or FL Studio
- Fixing Missed Notes and Timing Drift
- Making a Transcription Sound Human Again
- When Transcription Makes Sense (and When It Doesn't)
- PianoViz: Transcription Built for Piano, Not Adapted to It
- Sources
- FAQ
How to Turn Piano Audio Into MIDI
The workflow barely changes across tools, whether you're running a browser converter or a local app. Here's the version that works regardless of which route you pick:
- Prepare your audio: trim dead air, isolate the piano stem if it's part of a mix, and normalize volume.
- Pick a converter that matches your privacy and length needs.
- Set the instrument mode to piano (not "generic" or "polyphonic instrument") and, if the tool asks, enter your project's BPM.
- Run the conversion and preview the result before committing to a full download.
- Export the MIDI file and drag it into your DAW's piano roll.
Where you run that workflow matters more than most people assume:
- Browser tools are fast and need zero installation, but they usually cap file length or size, and your audio gets uploaded to someone else's server. Fine for a two-minute demo, less fine for a 45-minute recital recording.
- Desktop apps handle longer files better and can lean on your GPU for speed. A project like A2M demonstrates this pattern directly, running offline and supporting CUDA or DirectML acceleration, so a full album's worth of piano audio doesn't choke your machine.
- Open-source models, like Spotify's Basic Pitch, give you full control and no data leaving your computer, at the cost of more setup and less hand-holding.
Pick browser tools for quick one-off drafts, desktop apps when you're batch-processing or care about privacy, and open-source models when you want to tweak the transcription pipeline itself.
What Actually Determines Transcription Accuracy
Garbage in, garbage out applies here more than in almost any other audio task. A digital piano's direct output, or a close, dry mic on an acoustic piano, gives a transcription model the cleanest possible signal to work with. Room reverb and heavy pedal use are the two biggest accuracy killers, because they blur where one note's tail ends and the next note's attack begins, and research on reverb's effect on transcription confirms this isn't just a hunch.
File format matters too. Digital audio is just stored waveform data, and the more detail that waveform preserves, the more the model has to work with. That means:
- Use WAV or FLAC whenever you can record or export in those formats.
- A high-bitrate MP3 (256 to 320 kbps) is an acceptable fallback.
- Avoid low-bitrate MP3s ripped from streaming audio. They strip out the transient detail a model needs to pin down note onsets.
Beyond format, simple prep work pays off: trim silence, split long recordings into manageable sections, and if the piano is buried in a full mix, isolate it into its own stem before converting.
Pro Tip: If you recorded in a tempo-locked DAW project, feed the transcription tool your project's BPM before converting. Aligning the output to your grid up front saves you from manually stretching a rubato-heavy performance later.
Cleaning Up MIDI Once It's in Your DAW
No transcription comes out release-ready. Treat the raw MIDI file as a first pass, then work through it systematically:
- Scan for octave errors, a common failure point when low bass notes get misread an octave up or down.
- Merge any duplicated or stuttered notes where the model triggered twice on one attack.
- Tighten timing in short, clearly metronomic passages, but leave intentional rubato alone. Over-quantizing a rubato-heavy performance kills the phrasing that made it worth transcribing.
- Normalize velocities where the model over- or under-reacted to dynamics.
- Add sustain pedal data (CC64) back in manually. Almost no converter captures pedal, since it's inferred from note overlap rather than played directly.
Do your pitch corrections before you touch the pedal data. Adding CC64 information first, then discovering you need to shift a chord, means redoing pedal work you'd already finished.
Pro Tip: Always export and back up the raw, unedited MIDI before you start cleanup. If you overcorrect twenty minutes in, you'll want that untouched version to fall back on.
Once the notes and pedal data look right, load the file into a piano VST and actually listen. Reading a piano roll only tells you so much. Your ears will catch a wrong note or an awkward timing snap that your eyes glossed over.
What to Look for in a Piano-to-MIDI Tool
Not every audio to midi piano converter is built the same way, and the differences show up fast once you're working with real recordings instead of test clips. Before you commit to one, check it against this list:
- Piano-trained model. A generalist polyphonic model will struggle with dense chords and heavy sustain in ways a piano-specific model won't, since piano articulation patterns are distinct from guitar or brass.
- Local vs. cloud processing. If you're transcribing unreleased material, a local tool keeps your audio off someone else's server.
- Export formats. MIDI is standard, but MusicXML support matters if you're headed toward notation software instead of a DAW.
- Preview before download. A tool that lets you hear or view a partial result before spending credits or a download slot saves you from paying for a bad transcription.
- Length handling. Some tools choke on anything over a few minutes; check the limit before you upload a 20-minute practice recording.
If you're testing several tools before settling on one, prioritize whichever offers free previews. It's the fastest way to judge a model's handling of your specific playing style before spending money or a download credit.
Getting Your MIDI Into Ableton, Logic, or FL Studio
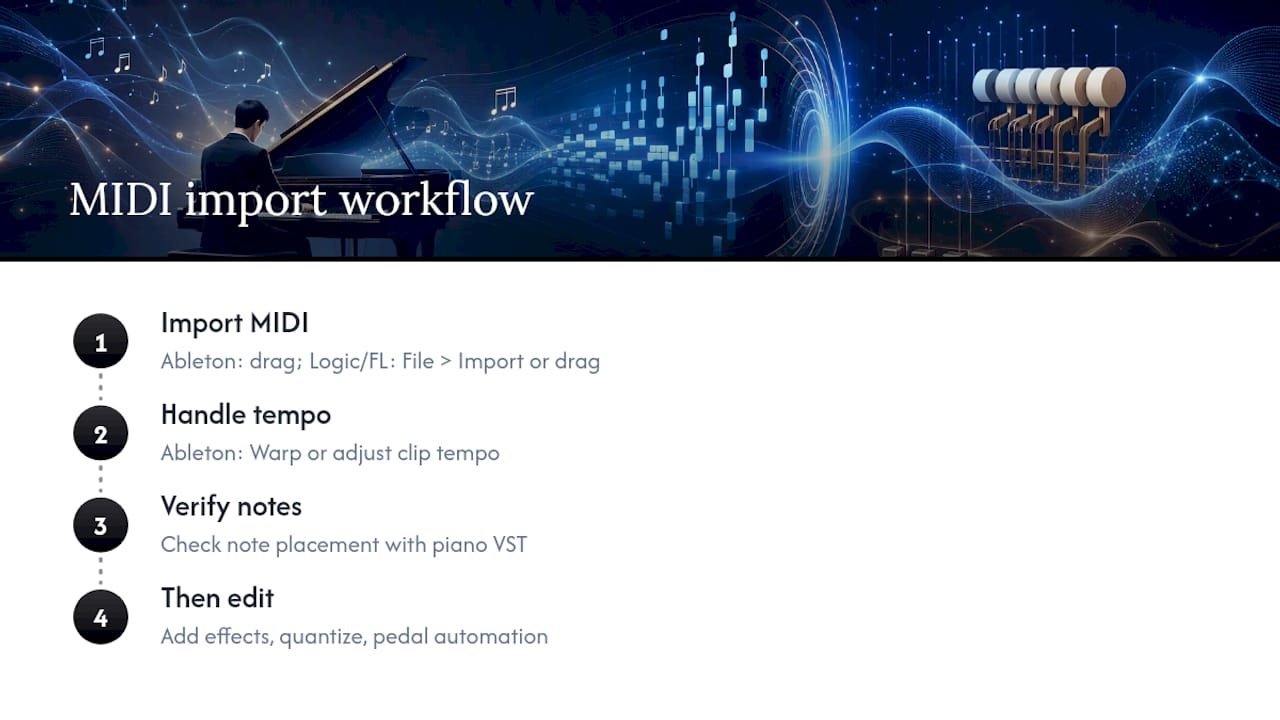
The import step is nearly identical across major DAWs, though the menu names differ slightly. In Ableton Live, drag the exported MIDI file straight from your file browser into a MIDI track, and Ableton automatically creates a clip with the notes mapped to the piano roll. If your project tempo doesn't match the file, use "Warp" settings or manually adjust the clip's tempo to lock it to your grid.
Logic Pro handles it through File > Import, or you can drag the MIDI file directly into the timeline. Logic will ask whether to import tempo information from the file. Say no if you've already set your own project tempo. Otherwise, you'll fight the DAW's click track the whole session.
FL Studio takes MIDI files through File > Import > MIDI file, which opens a dialog letting you choose whether to import as a new score, add to the current one, or extract just the tempo. FL Studio tends to be the most literal about tempo import, so double check the BPM field before finalizing.
Across all three, the same rule holds: import raw first, check note placement against a piano VST, and only then start layering in effects, quantization, or pedal automation. Editing before you've confirmed the notes landed correctly just means redoing that work twice.
Fixing Missed Notes and Timing Drift
Two errors show up in almost every piano transcription: missed notes and timing drift, and both have straightforward manual fixes.
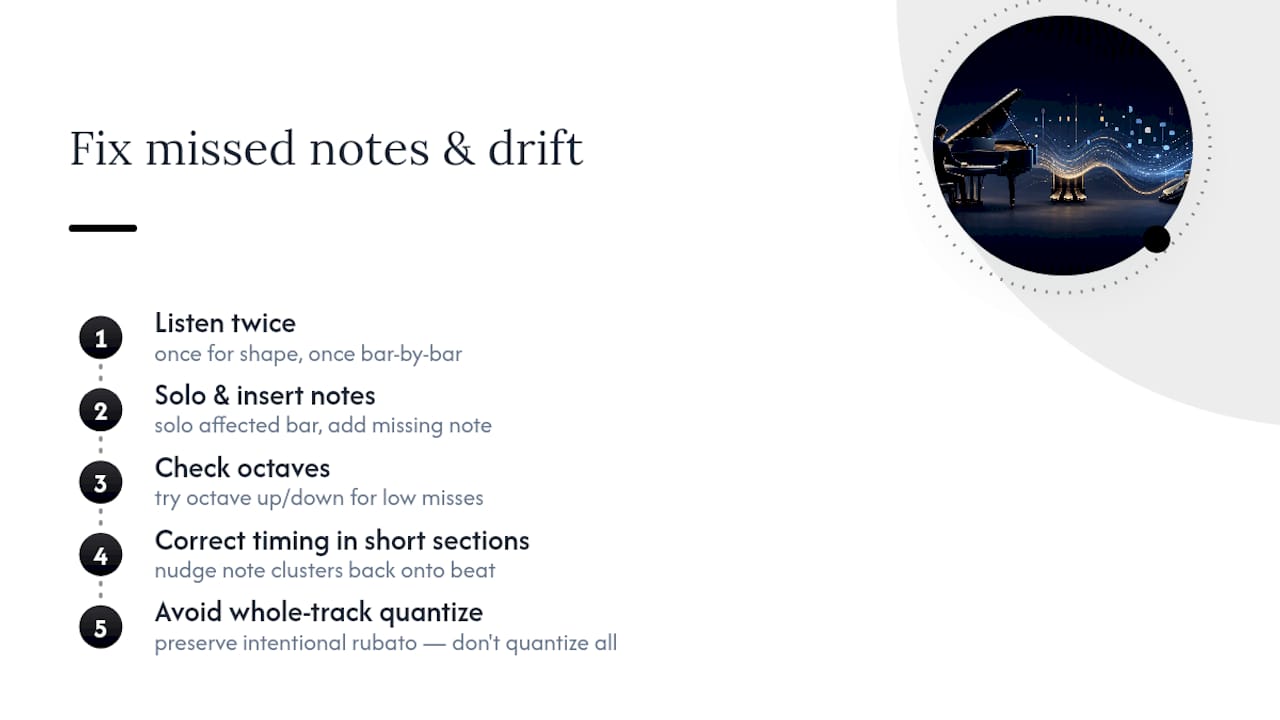
Missed notes usually happen in dense chords or very fast passages, where multiple attacks land close enough together that the model merges or drops one. Solo the affected bar in your piano roll, listen against the original recording, and manually insert the missing note at roughly the right pitch and timing. If you're seeing this constantly in low registers, it's often an octave error rather than a truly missing note, so check an octave up or down before assuming it's gone entirely.
Timing drift creeps in gradually across a passage rather than appearing as one obvious error, which makes it harder to spot. It's most common when the source recording had natural tempo fluctuation (rubato) that the model tried to interpret as a fixed grid. Rather than quantizing the whole track, work in short sections. Nudge clusters of notes back onto the beat where the drift is audible, and leave sections that sound musically intentional alone.
Both problems get easier to catch once you've listened to the transcription against the original recording at least twice: once for overall shape, once specifically listening for wrong or missing notes bar by bar. Skipping that comparison step is the single biggest reason people miss errors that are obvious in playback but invisible in a piano roll.
Making a Transcription Sound Human Again
A raw MIDI transcription usually sounds mechanical, even after you've fixed the wrong notes. Two adjustments close most of that gap.
Timing humanization means resisting the urge to quantize everything to a rigid grid. Most DAWs offer a "humanize" function that adds small, randomized timing offsets, but manual work usually sounds better: nudge a few notes in each phrase slightly ahead or behind the beat, mimicking how a real performance breathes.
Dynamic adjustment matters just as much. Transcription models often flatten velocity data, since dynamics are harder to infer accurately than pitch. Go through phrase by phrase and rebuild the crescendos and diminuendos the model missed, paying attention to which notes should sit louder in a chord (usually the melody line on top) versus which should recede into the harmony underneath.
Layering these together, corrected pedal data, humanized timing, and rebuilt dynamics, is what separates a transcription that sounds like a robot reading sheet music from one that sounds like it was actually played.
When Transcription Makes Sense (and When It Doesn't)
Transcribed MIDI is a great tool for study, arranging, or getting a quick editable draft of a performance you don't have the score for. But if a digital piano or keyboard captured original MIDI through USB or Bluetooth, use that instead. It's cleaner from the start. Save audio transcription for when it's your only option, and budget real cleanup time before you call the result release quality.
— Hadrien
PianoViz: Transcription Built for Piano, Not Adapted to It
Most audio to midi piano tools treat piano as one instrument among many. PianoViz doesn't. Its transcription engine is trained specifically on piano recordings, meaning it handles the dense chords, pedal-heavy sustain, and dynamic range that trip up generalist models, then exports the result as clean MIDI you can drop straight into a DAW.
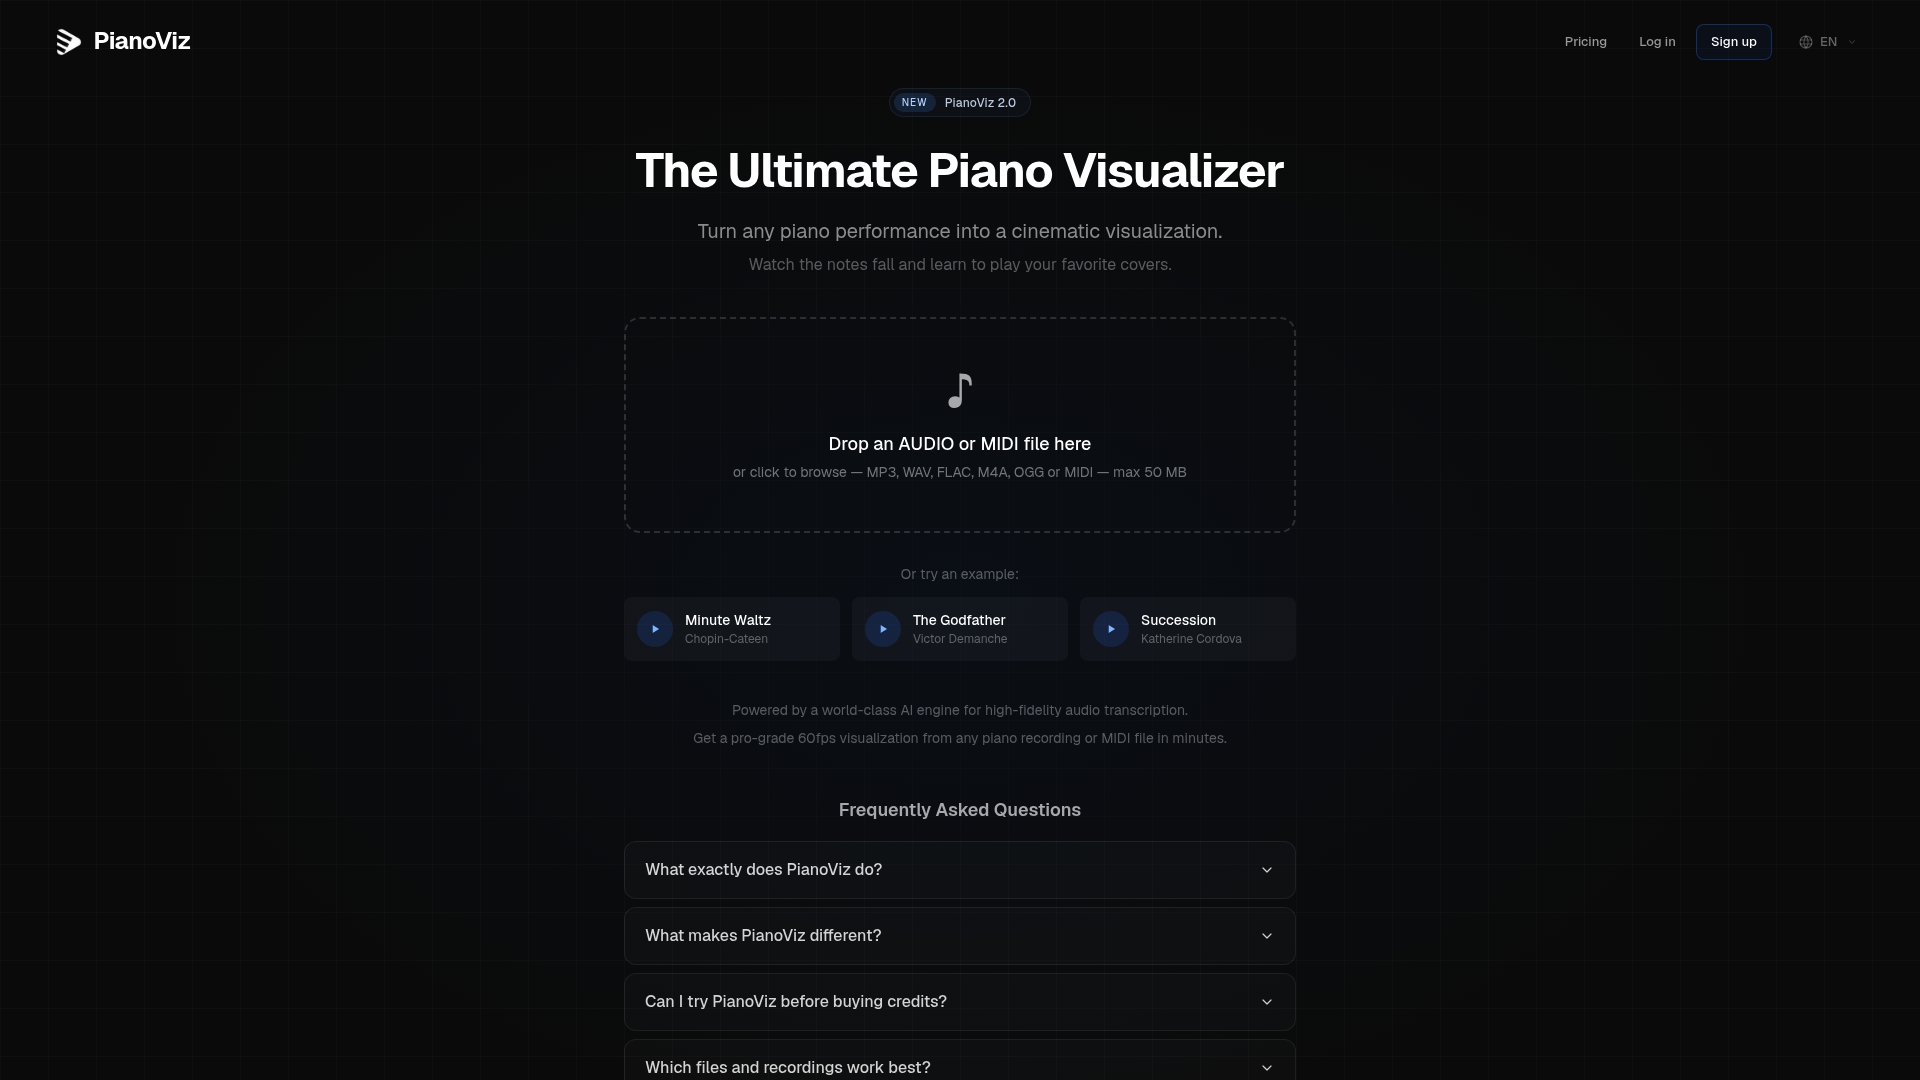
What makes PianoViz different from a converter you'd use once and forget is the second half of the pipeline: once your MIDI is transcribed, you can turn it into a cinematic falling-note visualization, exported as a Full HD MP4 at up to 60 frames per second. That's a real advantage for piano teachers building lesson content, YouTubers scoring performance videos, or anyone who wants both an editable MIDI file and a polished visual, without stitching together two separate tools. You can access a limited number of free previews with no account required, so you can test the transcription quality on your own recording before spending any credits. Head to PianoViz and run a preview on your next piano recording.
Sources
- Project report: effects of reverb on transcription (KoMuramatsu) — Hajim School of Engineering, Univ. of Rochester
- A2M — Audio to MIDI (GitHub)
- Digital audio — Wikipedia
FAQ
Can You Convert Piano Audio to MIDI?
Yes, solo piano recordings convert to editable MIDI reasonably well, especially from clean, dry sources like a digital piano's direct output.
How Accurate Is Piano Audio to MIDI Conversion?
Accuracy is strong on note pitch and rough timing but weaker on pedal data and dynamic nuance, so plan on manual cleanup in your DAW regardless of which tool you use.
Can I Convert MP3 to MIDI for Free?
Yes, several browser-based converters and open-source models like Basic Pitch offer free conversion, though free tiers often cap file length or limit downloads to previews.
What Is the Best Audio to MIDI Converter?
There's no single best option. Piano-trained models like PianoViz's engine tend to outperform generalist tools on dense chords, while desktop apps like A2M suit long files or privacy-sensitive projects, so the right pick depends on your source material and workflow.
Do I Need Original MIDI Instead of Transcribing Audio?
If your digital piano or keyboard already captured MIDI through USB or Bluetooth, use that file directly. It skips the transcription step entirely and avoids the accuracy limits of audio-based conversion.